This guide walks through every phase of the project, from permit requirements and footing depth to roof framing, flashing, and material selection. It's written for homeowners who want to understand what the work actually involves before committing to it — and to know clearly where professional help is not optional.
Key Takeaways
- A covered front porch deck is a raised structural platform with a permanently attached roof — permits, engineered footings, and proper flashing are all required.
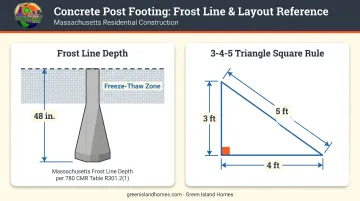
- Massachusetts sets the frost line at 48 inches — post footings on Cape Cod and Martha's Vineyard must reach that depth.
- The build sequence: permits → footings and posts → ledger board → header beam and rafters → roof decking and underlayment → finish roofing → gutters and trim.
- Coastal hardware must be stainless steel or hot-dip galvanized — standard connectors corrode within miles of the ocean.
- Hire a licensed contractor for structural framing, ledger attachment, and roof installation.
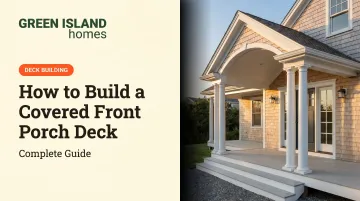
What Is a Covered Front Porch Deck — and Why Build One?
A covered front porch deck is a raised structural platform at the front of a home, topped by a permanent roof supported by posts and connected to the house structure. It's weather-protected outdoor space you can use year-round.
It sits in a different category from several look-alike structures:
- Pergola — open lattice roof, no weather protection
- Stoop — a landing, not a deck platform
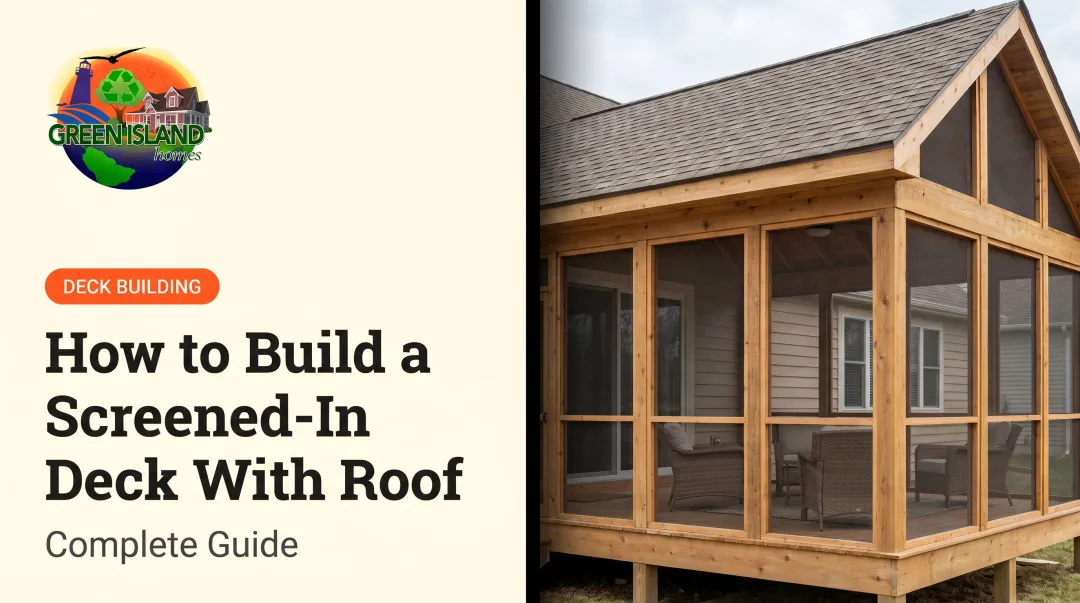
- Screened porch — enclosed on the sides, classified differently under IRC Appendix H
The covered porch sits in its own category: permanent, load-bearing, attached, and regulated as a structural addition.
The Case for Building One
Sun and rain protection extends the usable season considerably on Cape Cod and the Vineyard, where coastal weather shifts fast. Curb appeal is immediate — a well-designed porch changes how the entire front elevation reads.
That curb appeal also translates at resale. The 2025 JLC Cost vs. Value Report puts a wood deck addition at $18,263 job cost with 95% cost recouped at resale, and a composite deck at $25,096 with 89% recouped. These benchmarks cover deck additions, not a roofed porch specifically — a permanent roof with structural posts, wind-rated hardware, and coastal flashing will push costs higher. Still, it's a strong directional indicator that outdoor structural additions hold their value well.
Planning and Permits: What to Do Before You Break Ground
Permits Are Not Optional
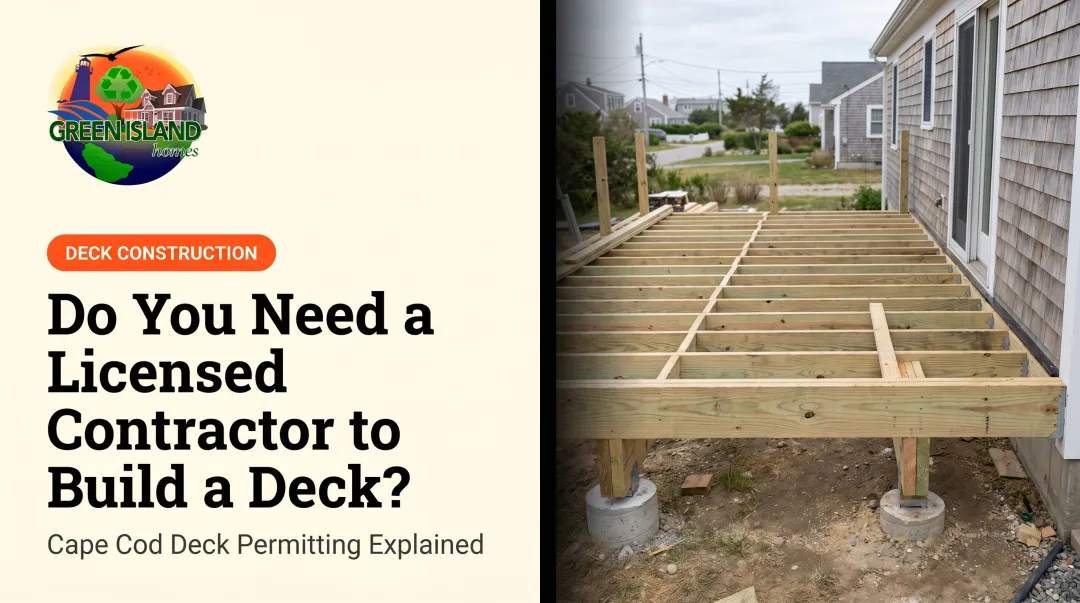
Under Massachusetts 780 CMR R105.1, it's unlawful to construct, alter, or repair a regulated building or structure without a permit. The deck exemption in R105.2 is narrow: it covers only decks under 200 sq. ft., not more than 30 inches above grade, unattached to the dwelling, and not serving a required exit. A covered front porch deck fails every one of those exemption criteria.
Edgartown's building office and Barnstable's Building Division both confirm permits are required for porches, decks, and additions. Permit fees and review timelines vary by town, so contact your local building department before you finalize any plans.
If you're in a historic district on Martha's Vineyard, the Martha's Vineyard Commission DRI Checklist (Version 15, effective January 1, 2026) may also require referral for exterior alterations to structures over 100 years old where the change affects 25% or more of the facade.
Load-Bearing Assessment and Footing Requirements
Adding a roof changes the structural math entirely. The roof's dead load transfers down through posts into footings, and existing footings on older decks are almost never sized for that added weight. Get a structural assessment before design is finalized — it determines whether you're reinforcing existing footings or replacing them.
Two requirements govern every footing on this project:
- Frost depth: Massachusetts sets the frost line at 48 inches per 780 CMR Table R301.2(1). Footings that fall short heave with the freeze-thaw cycle, pushing posts out of plumb and stressing the ledger connection against the house wall.
- Square layout: Use the 3-4-5 rule to verify corners — measure 3 ft along one side, 4 ft along the adjacent side, and confirm the diagonal is exactly 5 ft. For larger layouts, the 6-8-10 multiple works the same way.
With footings planned and permits underway, the next decision is how the roof structure will connect to your home.
Support Methods and Setback Rules
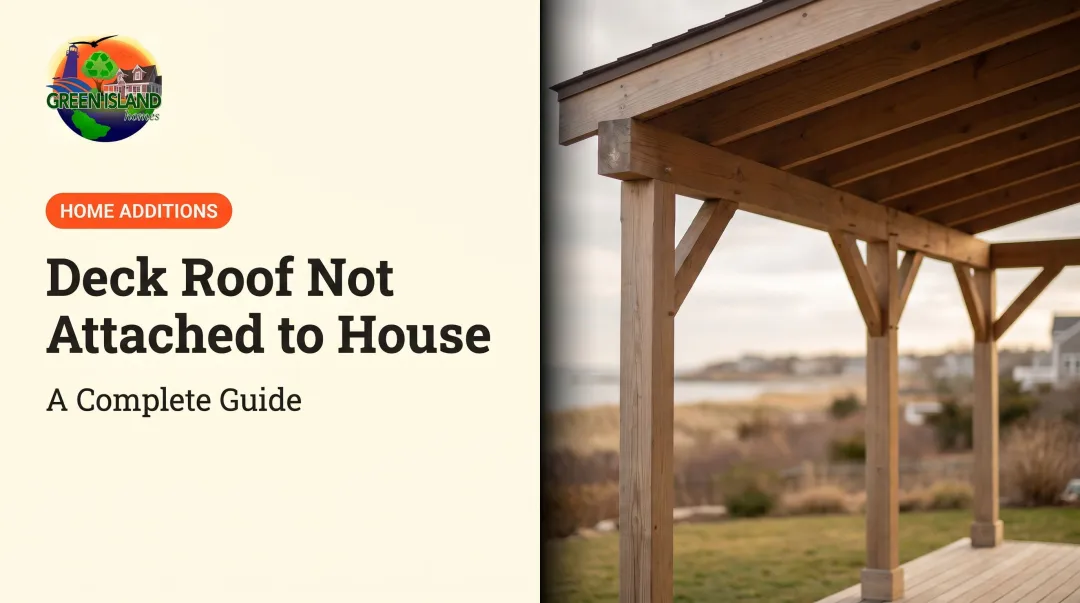
Three approaches exist for supporting the roof structure:
- Ledger board attachment — most common for attached front porches; ties the roof system directly to the home's wall framing
- Blending into the existing roofline — most complex; requires roof surgery and structural coordination
- Freestanding structure — avoids wall modification but requires additional posts and footings
Most attached front porch decks use the ledger approach. It's efficient and structurally sound when done correctly with proper flashing.
Before finalizing your design, check local setback rules. Barnstable's residential zoning tables include height and dimensional limits by district. HOA restrictions, where they exist, are property-specific and require separate review.
Step-by-Step: How to Build a Covered Front Porch Deck
This is a multi-day skilled project. Sequence matters: an unlevel post or undersized footing at the start compounds through every step that follows.
Step 1: Set the Footings and Posts
Dig post holes to 48 inches (Massachusetts frost line). Set concrete form tubes, pour concrete, and embed post bases. Allow full cure before loading the posts.
Once cured, cut posts to the correct height based on your desired roof pitch. Use a post level and temporary diagonal bracing to plumb each post before any beams land on them.
Step 2: Attach the Ledger Board
Cut away siding with an oscillating tool to expose the wall framing. Fasten a 2×8 (or appropriately sized) ledger board to the structural framing using lag screws and washers — fastening into sheathing alone is not sufficient.
Flashing is non-negotiable. AWC DCA6 requires corrosion-resistant flashing at least 0.019 inch thickness at all deck-to-wall connections, integrated behind the siding on all ledger edges.
Material compatibility matters here: do not use aluminum flashing in direct contact with copper-based preservative-treated lumber (ACQ or Copper Azole). Use compatible metal or approved nonmetallic flashing instead.
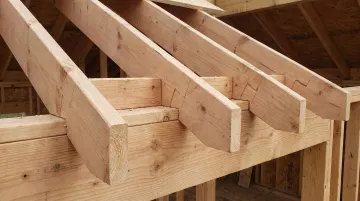
Step 3: Install the Header Beam and Rafter System
Build a header beam by sandwiching plywood between two lengths of dimensional lumber (typically 2×10), then connect the outer posts with this beam.
For rafters, cut a bird's mouth — a notched seat cut — where each rafter sits on the header beam. Cut one template rafter first, test its fit and pitch, then duplicate all others from that template. This step prevents rafter roll and misalignment across the full span.
Install blocking between rafters at the header to close gaps and prevent lateral movement.
Step 4: Install Roof Decking and Underlayment
Cut and fasten plywood or OSB roof sheathing so panel ends land on supports. For long edges without support below, use edge clips, blocking, or tongue-and-groove panels as required by span rating and manufacturer guidance — leave 1/8 inch spacing at panel joints per APA guidelines.
For drip edge and underlayment sequencing: install drip edge first at the eaves, then lay underlayment over it. At rake edges, install underlayment first, then drip edge over it. Work from the bottom of the slope upward.
Roof pitch matters for material selection:
- Asphalt shingles require 2:12 minimum slope; from 2:12 to 4:12, IRC requires two layers of underlayment
- Standing-seam metal systems can go as low as 1/4:12 per IRC R905.10.2
Confirm your chosen material's minimum slope requirement before framing the roof.
Step 5: Apply the Roofing Material
Install finish roofing from the bottom of the slope to the ridge, maintaining manufacturer-specified overlap. For asphalt shingles in coastal wind zones, specify products rated to ASTM D3161 Class F or ASTM D7158 Class H — both GAF Timberline HDZ and Owens Corning Duration shingles meet this standard.
For metal roofing, use rubber-washered fasteners at every penetration. Color-matched screws are standard; the washer seal prevents the leak points that plague improperly fastened metal panels.
Step 6: Gutters, Downspouts, and Finishing
Slope gutters correctly toward downspouts — pooling gutters overflow against the fascia and eventually rot it. Direct downspouts away from footings.
Complete the remaining finish work in order:
- Install decking boards using your chosen material and fastener pattern
- Add railings and steps per local code requirements
- Paint or stain all exposed wood before seasonal exposure sets in
On Cape Cod and the Islands, that last step isn't optional. Salt air, UV, and moisture work fast on bare wood — a quality exterior paint or UV-resistant stain is what stands between new lumber and rot within a few seasons.
Choosing the Right Roof Style and Materials
Roof Style Options
| Style | Best For | Tradeoff |
|---|---|---|
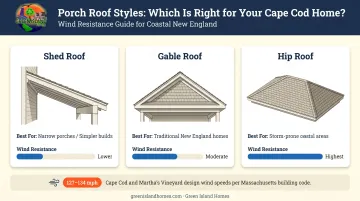
| Shed roof | Narrow porches, simpler builds | Lower visual weight; needs adequate pitch for snow and rain |
| Gable roof | Traditional New England homes | Better drainage, stronger visual presence; more complex framing |
| Hip roof | Storm-prone coastal areas | Best wind resistance; most complex to frame |
For Cape Cod and Martha's Vineyard, wind load should drive this decision as much as aesthetics. Under 780 CMR Table R301.2(2), ultimate design wind speeds reach 127–132 mph across Cape Cod towns and 133–134 mph on Martha's Vineyard. A hip roof's geometry significantly reduces wind uplift compared to a gable or shed design.
Structural Materials and Hardware
Pressure-treated lumber is the standard for framing. For visible posts in salt-air environments, cedar heartwood or old-growth redwood heartwood (both classified as decay-resistant per the USDA Wood Handbook) are the better choice for exposed elements.
Hardware selection is where coastal projects diverge most sharply from inland builds. Simpson Strong-Tie notes that locations up to 10 miles from the ocean face chloride corrosion risk, and calls stainless steel the best long-term solution for coastal and marine environments. Standard galvanized connectors are not sufficient in severe exposure zones. Use:
- Stainless steel post bases, joist hangers, and hurricane ties in severe salt-air exposure
- Hot-dip galvanized (HDG) or ZMAX connectors in moderate exposure — always with compatible fasteners
- UC4B pressure-treated lumber for any ground-contact members in saltwater-splash zones (per AWPA U1-24)
Ceiling and Soffit Options
- Beadboard — classic New England look, works well on painted ceilings in covered porches
- Open rafters — lower cost, rustic aesthetic
- Vinyl or PVC soffit panels — near-zero maintenance, good resistance to moisture and insects in humid coastal conditions
Common Mistakes to Avoid
Skipping Permits or Undersizing Footings
Building without a permit in Massachusetts creates real exposure: fines, required removal, and complications at resale. More structurally serious is undersized footings — the roof load must be accounted for from the footing design up, not added to a deck that was never engineered for it.
Improper Flashing at the Ledger
The ledger-to-wall connection is the most leak-prone point in any attached porch addition. Flashing must be integrated behind the siding, use compatible materials (no aluminum against ACQ-treated lumber), and cover all four edges of the ledger.
Roof pitch matters here too. Asphalt shingles require a 2:12 minimum, and anything close to that threshold in a high-rainfall coastal climate — like Cape Cod or Martha's Vineyard — warrants a serious look at metal roofing instead.
Footings Above the Frost Line
In Massachusetts, any footing shallower than 48 inches is a problem. The freeze-thaw cycle will heave posts seasonally, crack the concrete, and progressively damage the ledger connection. There's no cheap fix once it starts — the footings have to come out.
Should You DIY or Hire a Professional?
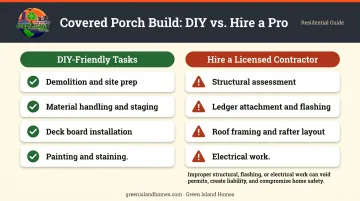
Some phases of this project are realistic for experienced DIYers:
- Demolition and site prep
- Material handling and delivery staging
- Deck board installation
- Painting and staining
Other phases carry enough structural and waterproofing risk that errors become expensive problems:
- Structural assessment of existing footings and framing
- Ledger board attachment and flashing integration
- Roof framing, bird's mouth cuts, and rafter layout
- Any electrical work for porch lighting
Mistakes in framing and waterproofing don't stay cosmetic — they become rot, structural movement, and failed inspections. The ledger flashing detail alone has produced more long-term wall damage in attached porch additions than nearly any other single construction error.
That's where local expertise pays off. For homeowners on Cape Cod and Martha's Vineyard, working with a licensed and insured contractor for the structural phases eliminates that risk. Green Island Homes handles deck construction and roofing throughout both service areas, with direct familiarity with local building departments, coastal wind load requirements, and the material specs that hold up in salt air.
Reach them at 774-563-9714 or sales@greenislandhomes.com to discuss your project.
Frequently Asked Questions
What is the 3/4/5 rule for decks?
It's a geometry check for square corners: measure 3 feet along one side and 4 feet along the adjacent side. If the diagonal between those two points measures exactly 5 feet, the corner is a true 90 degrees. The 6-8-10 multiple works the same way for larger layouts.
How much does it cost to build a front porch with a roof?
The 2025 JLC Cost vs. Value Report benchmarks a wood deck addition at $18,263 and composite at $25,096 nationally. A roofed porch adds structural posts, wind-rated hardware, ledger flashing, and a full roof assembly — so project-specific quotes are the only reliable number. Labor markets on the Cape and Vineyard typically run above national averages.
Do I need a permit to build a covered front porch deck?
Yes. Massachusetts 780 CMR R105.1 requires a permit for any permanent structural addition. The deck exemption in R105.2 does not apply to attached, roofed structures. Proceeding without a permit risks fines, required removal, and title complications at sale.
What roof style is best for a coastal or stormy climate?
Hip roofs perform best in wind-prone areas: their four-sided slope reduces uplift better than gable or shed designs. Gable roofs handle heavy rain well, while shed roofs are simplest to build but need adequate pitch for runoff and snow load.
How deep do porch post footings need to be?
In Massachusetts, footings must extend to 48 inches below grade per 780 CMR Table R301.2(1), placing them below the frost line to prevent seasonal heaving. Confirm the specific requirement with your local building department before breaking ground.
Can I add a covered roof to an existing front porch deck?
Yes, but it requires a structural assessment first. Existing footings and posts are rarely sized for the added roof load. In most cases, footings need to be reinforced or replaced — you can't simply build a roof on top of an existing deck frame without verifying the whole system can carry the new load.