The result? Cedar siding that performs beautifully when maintained properly can deteriorate quickly when small issues go unaddressed. Rot, warping, and caulk failure don't stay small for long in a coastal environment.
This guide covers the most common failure modes for vertical cedar siding, a step-by-step repair process, how to decide between fixing individual boards versus re-siding, and when to call a professional rather than tackle the project yourself.
Key Takeaways
- Vertical cedar siding fails most often from rot, warping, cracking, and caulk breakdown at joints and trim intersections
- Isolated board damage can be repaired by removing and replacing individual sections — a DIY-feasible repair
- Every replacement board should be back-primed on all four sides and both ends before installation
- In coastal areas, use No. 316 stainless steel or hot-dipped galvanized ring shank nails — standard fasteners corrode
- Always inspect the house wrap beneath removed boards before reinstalling — this single step prevents repeat rot
- When damage is widespread or the wall assembly beneath is compromised, full replacement is the smarter investment
What Is Vertical Cedar Siding?
Vertical cedar siding is exterior cladding where boards run from roofline to foundation rather than horizontally. Three profiles cover most installations:
- Board and batten — Wide vertical boards with narrow strips (battens) covering the seams; a common combination is 1×10 boards with 1×3 battens. The most widely recognized vertical cedar profile.
- Tongue and groove — Interlocking boards with a V-shaped or flush joint profile; can be installed vertically, horizontally, or diagonally.
- Channel (lap) siding — Boards that partially overlap adjacent boards, creating a shadow-line channel; also installable in multiple orientations.
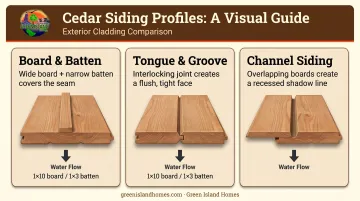
The vertical orientation naturally sheds water downward. The trade-off is that board joints, bottom edges, and horizontal trim intersections become the primary moisture collection points. According to FEMA's coastal construction guidance, water can enter through seams and joints by capillary wicking — meaning it moves against gravity in tight gaps — so even well-installed siding needs regular joint maintenance.
Why cedar degrades over time: Cedar resists rot better than most wood species because its heartwood extractives — phenolic compounds, thujaplicins, and water-soluble compounds — are toxic to wood-destroying fungi. But that natural resistance fades. UV exposure breaks down the wood surface, finishes wear thin, and uncoated end grain absorbs moisture readily. On Cape Cod and Martha's Vineyard, where salt air and high UV combine, maintenance intervals matter more than in inland climates.
Common Problems With Vertical Cedar Siding
Most failures follow predictable patterns. Identifying which problem you're dealing with before starting any repair prevents repeat failures and avoids removing boards that don't need replacement.
Wood Rot
Soft or spongy texture under a screwdriver, dark discoloration, and paint bubbling over a localized area all point to rot. The culprit is sustained moisture contact through one of three common entry points:
- Failed caulk around windows and doors
- Missing or damaged flashing at roof-to-wall intersections
- Boards installed too close to grade where water pools
Warping and Cupping
Boards bowing outward, widening gaps, and nails backing out indicate cupping. This happens when a board's exterior face dries faster than its back, creating a moisture imbalance. Inadequate back-priming before installation or a failed weather-resistant barrier underneath makes it worse.
Cracking and Splitting
Signs to look for: lengthwise cracks along the grain, shallow surface checking across the board face, and splits at nail holes. UV exposure dries out natural oils over time, and seasonal movement widens existing checks. Splits at nail holes specifically point to fasteners driven too close to board edges.
Caulk and Joint Failure
Visible gaps at board joints, around trim, and along corner boards — combined with water staining on adjacent interior walls — signal caulk failure. The NAHB's component life-expectancy data puts caulking and sealer life at 2–20 years. On coastal homes like those on Cape Cod and Martha's Vineyard, south- and west-facing walls typically hit the lower end of that range.
How to Repair Vertical Cedar Siding: Step-by-Step
Attempting repairs without confirming the full extent of damage risks missing hidden rot in adjacent boards or the wall assembly behind them. A thorough assessment before removing anything prevents the most expensive surprise: opening one board and finding three more need to come out.
Step 1: Assess the Damage and Gather Materials
Probe suspect boards with a screwdriver or awl. Sound wood resists penetration; soft or hollow spots indicate rot that may extend further than the visible surface. Mark every board requiring replacement before touching anything.
Tools needed:
- Flat pry bar, oscillating multi-tool with metal-cutting blade
- Hammer, drill/driver, circular saw, tape measure, speed square
- Caulk gun, safety glasses
Materials needed:
- Replacement cedar boards, back-primed before installation
- Corrosion-resistant ring shank nails (see fastener note below)
- Exterior-grade paintable acrylic caulk — note that pure silicone is not recommended for cedar
- Primer and exterior paint matched to existing finish
Fastener specification: Real Cedar's installation guidance specifies corrosion-resistant fasteners — hot-dipped galvanized, aluminum, or stainless steel — with ring-threaded or spiral-threaded shanks for greater holding power. For seacoast exposure on Cape Cod and Martha's Vineyard, No. 316 stainless steel is the recommended grade.
While you're assessing boards, check all caulk at window and door frames and at board joints. Failed caulk near damaged boards is almost always a contributing cause and must be addressed in the same repair scope.
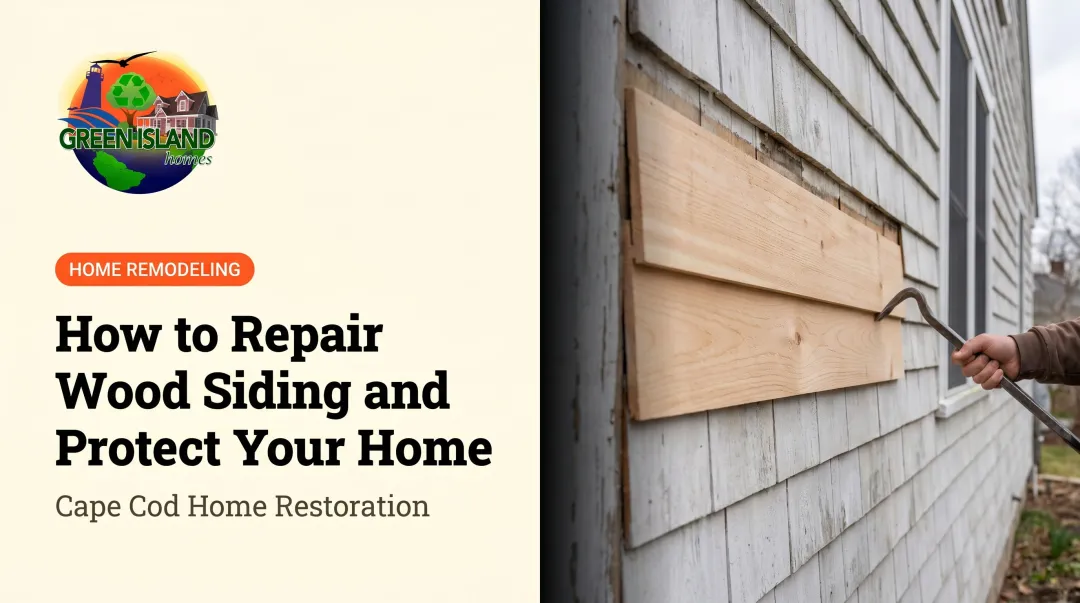
Step 2: Remove the Damaged Boards
Use a flat pry bar backed by a piece of scrap plywood to protect adjacent boards. Work the damaged board away from the wall starting at the top and moving downward.
Rather than forcing the board off — which can tear the house wrap or crack neighboring boards — cut through the nails with an oscillating multi-tool. Clean cuts through the fasteners protect adjacent boards and leave the house wrap intact.
Once the board is off, inspect the house wrap or vapor barrier for tears, moisture saturation, or mold. Patch any compromised sections with self-adhesive flashing tape or new house wrap before proceeding. Skipping this inspection is the single most common reason rot recurs after a repair.
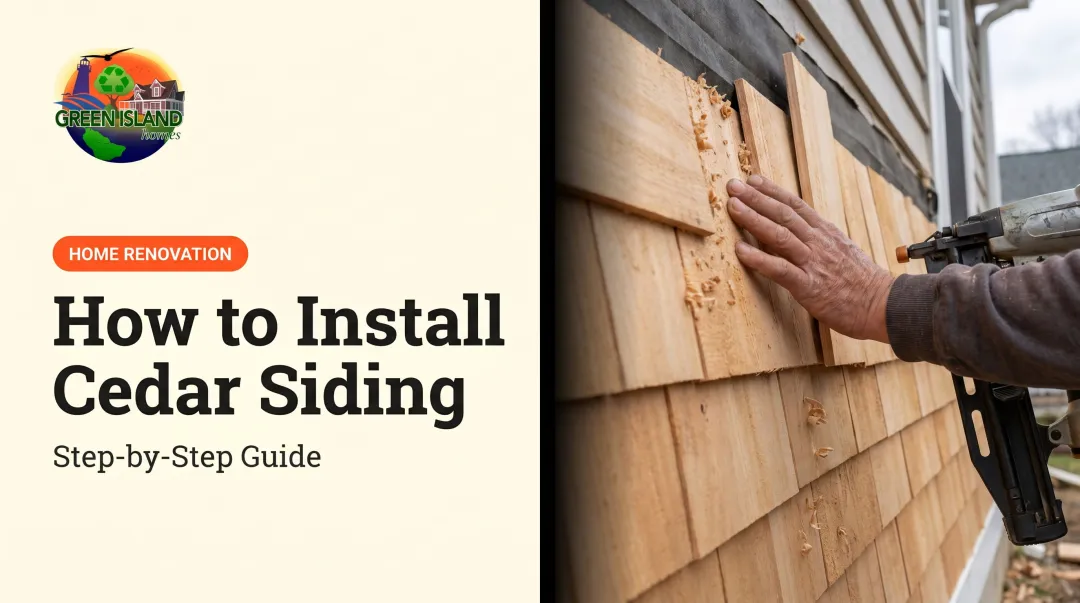
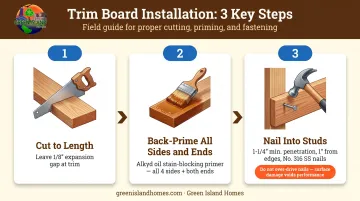
Step 3: Cut and Install the Replacement Board
Use the removed board as a template. If it's too deteriorated to measure accurately, measure the opening directly. Then work through these three steps in order:
- Cut to length — leave a 1/8-inch expansion gap at horizontal trim intersections to allow for seasonal movement
- Back-prime all four sides and both ends with an exterior alkyd oil stain-blocking primer before installation; end grain is especially absorbent, and unprimed ends are a primary moisture entry point on vertical siding
- Nail into wall studs, locating them by the nail pattern on adjacent boards; per Real Cedar's specs, nails should penetrate at least 1-1/4 inches into solid wood, set at least 1 inch from board edges to prevent splitting — don't over-drive, which crushes wood fiber and traps moisture
Step 4: Caulk, Prime, and Paint
Apply paintable exterior acrylic caulk along all vertical joints, around window and door trim, and wherever the new board meets existing horizontal surfaces. Smooth the bead with a wet finger and allow it to skin over per manufacturer instructions before painting.
Then:
- Apply an exterior primer coat over the repair, feathering into the surrounding surface
- Apply two finish coats of exterior paint, paying extra attention to end cuts and bottom edges
- Once paint has cured, check board alignment against adjacent boards — any surface-plane gap can channel water behind the siding and needs a caulk bead before the job is done
When to Repair vs. Replace Vertical Cedar Siding
The decision comes down to three factors: how widespread the damage is, what condition the wall assembly beneath is in, and whether the rest of the siding has serviceable life remaining.
Repair when:
- Damage is limited to isolated boards and the surrounding siding is in good condition
- The house wrap, sheathing, and studs beneath show no signs of moisture damage
- The overall siding has several years of life remaining with normal maintenance
Replace when:
- Rot or warping has spread across multiple wall sections
- Sheathing or studs beneath show moisture damage or structural compromise
- The siding has gone through multiple maintenance cycles without upkeep and is approaching end of life — at that point, cumulative repair costs often exceed the cost of a clean re-side
The condition of the wall assembly matters as much as the visible siding damage. A single soft stud or saturated sheathing panel changes the calculation entirely.
Knowing those repair-vs-replace thresholds also puts cost estimates in context. According to Angi's 2026 data, cedar siding installation runs $5–$11 per square foot nationally, with board-and-batten cedar at $6–$10 per square foot. Wood siding repair averages $9.50 per square foot. Use those as benchmarks, not firm quotes — coastal labor markets on the Vineyard and Cape Cod will reflect local conditions.
If you're weighing repair versus replacement on a Cape Cod or Martha's Vineyard home, Green Island Homes offers professional siding assessments — evaluating both the visible damage and the wall assembly beneath. Reach them at 774-563-9714 or sales@greenislandhomes.com.
Preventive Maintenance to Protect Your Cedar Siding
Repairs are expensive. Maintenance is cheap by comparison. Four habits protect cedar siding more than anything else:
Refinish on schedule. Real Cedar recommends refinishing when the existing coating has worn thin and no longer protects the wood — don't wait until paint is peeling. On coastal walls with heavy UV exposure, that typically means a recoat every 4–5 years on exposed elevations, longer on sheltered ones.
Re-caulk annually. Check all joints, window and door perimeters, corner boards, and anywhere siding meets a dissimilar material. Catching failed caulk before water gets behind it is the single most effective thing you can do to prevent rot — and the most commonly skipped task on cedar-sided homes.
Maintain clearance at grade. Real Cedar specifies a minimum of 6 inches between the bottom edge of siding and grade, a requirement also codified in building codes. Wood in contact with soil retains moisture and accelerates rot. Keep gutters and downspouts clear to prevent splash-back against lower courses.
Address minor damage immediately. A popped nail, a small split, or a patch of peeling paint may look cosmetic, but each one is an open door for moisture. In coastal conditions — salt air, high humidity, and persistent wind-driven rain — a minor issue in spring can be a rotted board by fall.

Frequently Asked Questions
What is the name of vertical cedar siding?
The most widely recognized term is board and batten — wide vertical cedar boards with narrow strips (battens) covering the seams. Tongue and groove and channel siding are two other vertical cedar profiles, though board and batten is the style most homeowners mean when they refer to vertical cedar siding.
Can mice get in under siding?
Yes. University of Nebraska Extension research confirms mice can enter gaps as small as 1/4 inch. Damaged boards, gaps at the foundation line, or open bottom edges all create entry points. Keeping siding in good repair and installing 24-gauge, 1/4-inch galvanized hardware cloth at weep openings helps prevent pest entry.
How long does cedar siding last if properly maintained?
Well-maintained cedar siding can last several decades, though no single number holds across all climates and maintenance habits. Longevity depends on regular coating upkeep, annual caulk inspection, prompt board replacement, and fastener condition — factors that matter especially in coastal salt-air environments like Cape Cod and Martha's Vineyard.
Can you repair rotted cedar siding without replacing the board?
Surface-level rot with intact wood fiber can be stabilized temporarily using an epoxy consolidant and filler. However, epoxy repairs are suitable only for non-structural, cosmetic applications. Any board with structural rot — soft, crumbling fiber — must be fully replaced. Epoxy on compromised structural wood masks the problem without solving it.
How often should vertical cedar siding be painted or stained?
Refinish when the existing coating has worn thin, not on a fixed calendar. In practice, that's roughly every 5–7 years under normal conditions and every 4–5 years on south- and west-facing walls with heavy UV or coastal salt-air exposure — waiting until paint peels significantly drives up prep time and cost.